HOW TO CREATE A GALLERY WALL
Share
We recently had to redo our gallery wall and thought it was a good time to film the process and give some simple steps and ideas if you want to create your own.
Easy Steps for Creating a Gallery Wall
Step 1: Remove any existing pictures and give the wall a quick clean.
Step 2: Use spare paper (we used paper grocery bags) to cut out shapes the same size and shape of your frames and objects you want to use on your gallery wall.
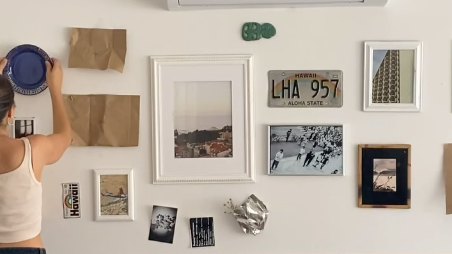
Step 3: Tape the paper cut outs and start hanging up on the wall. Don't expect to get it right on the first go. It can take a lot of rearranging until the wall feels right. We like to do a mix of horizontal and vertical along with using different objects. We love to add in our plates as a unique display feature and also to add curves to the gallery wall a juxtaposition to the rectangle photographs and artwork.
Step 4: Replace the paper placeholders with actual frames, artworks, and objects you want on the wall. We like to do a mix of colour and black and white prints. Again it takes awhile to get it right and make sure you are trying different photographs or pieces of art until it feels right to you.
While it sounds easy when listed in 4 steps remember this is a time consuming process that requires a lot of testing and changing before it feels right to you. Don't be afraid to step outside of prints and photographs and incorporate items like plates, license plates, 3D artwork, and souvenirs. You will be surprised how these mixtures of mediums and textures really come together.
Happy Gallery Walling!